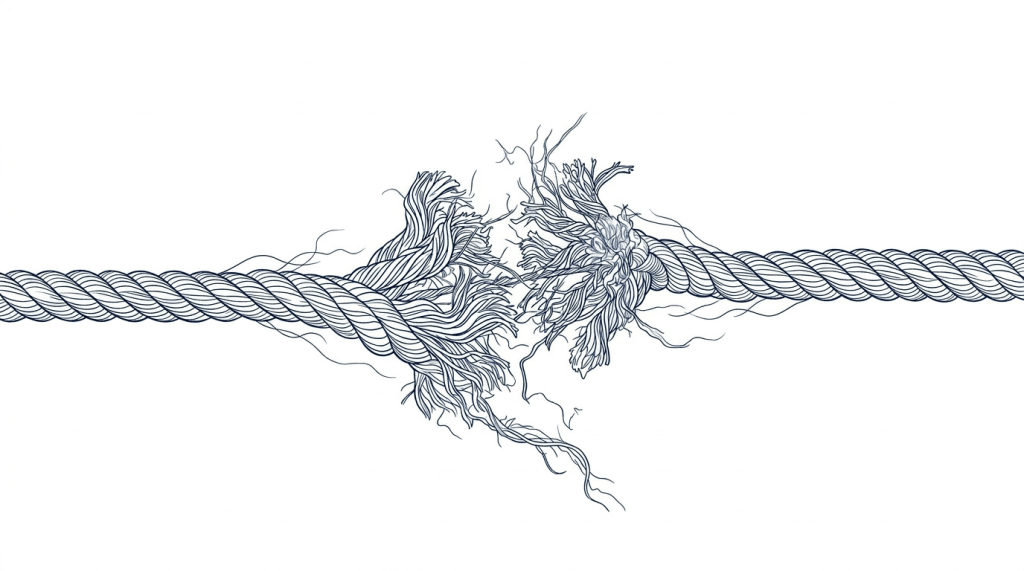
On a stormy March morning in Chania, Crete, we broke a line. Specifically, a line rigged to the “shock absorbers” that help us moor safely in heavy weather. An axiom of boating is that “things break,” and when they do, you fix or replace them. We needed to get that piece of equipment back in working order by replacing the line.
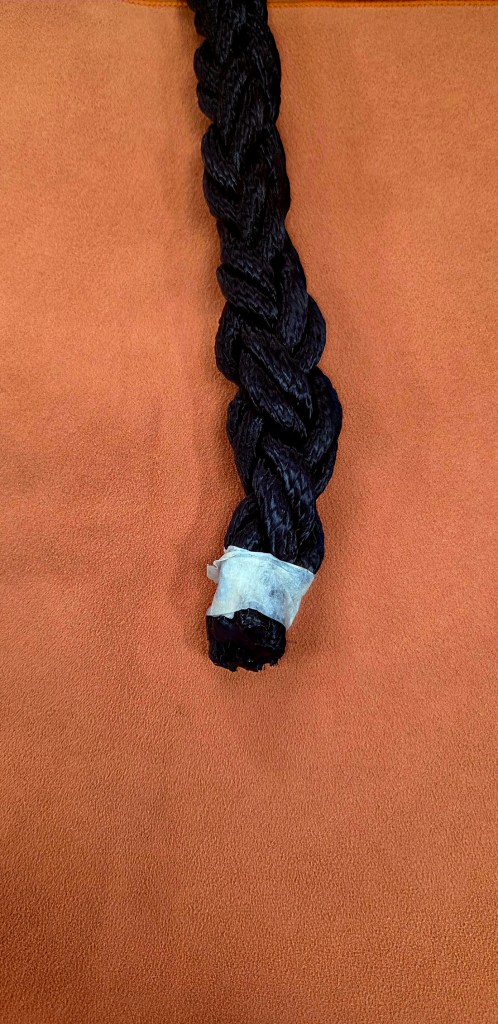
At a marine store back in Malta, John had purchased an identical rope, an eight-strand nylon line.
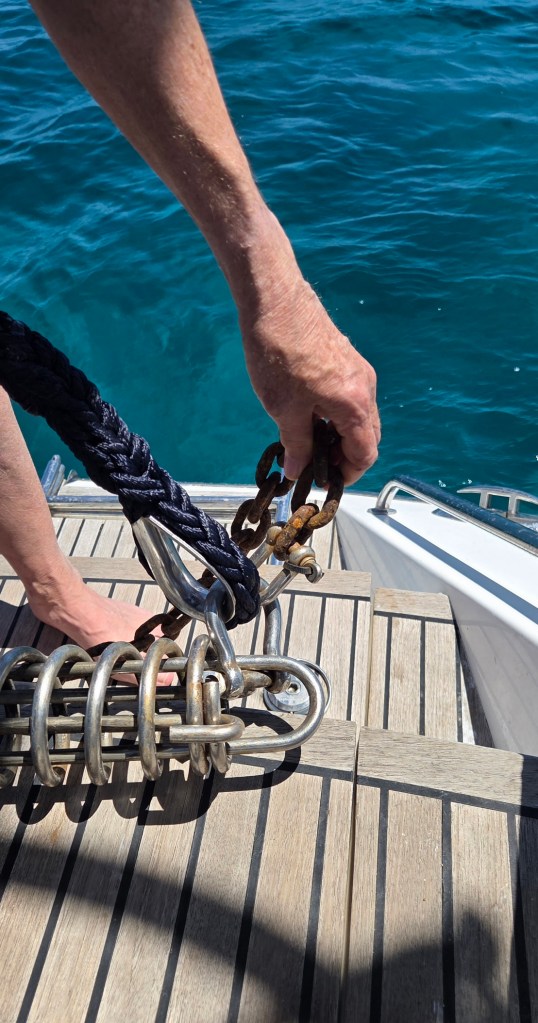
The broken line was spliced around something called a thimble: a metal piece that reinforces the loop and can be shackled in to the part with the heavy spring.
The whole thing is very strong and can take incredible force. We believe the line broke because we had not adequately protected it against repeated chafe—a lesson we will take to heart and remedy this time.
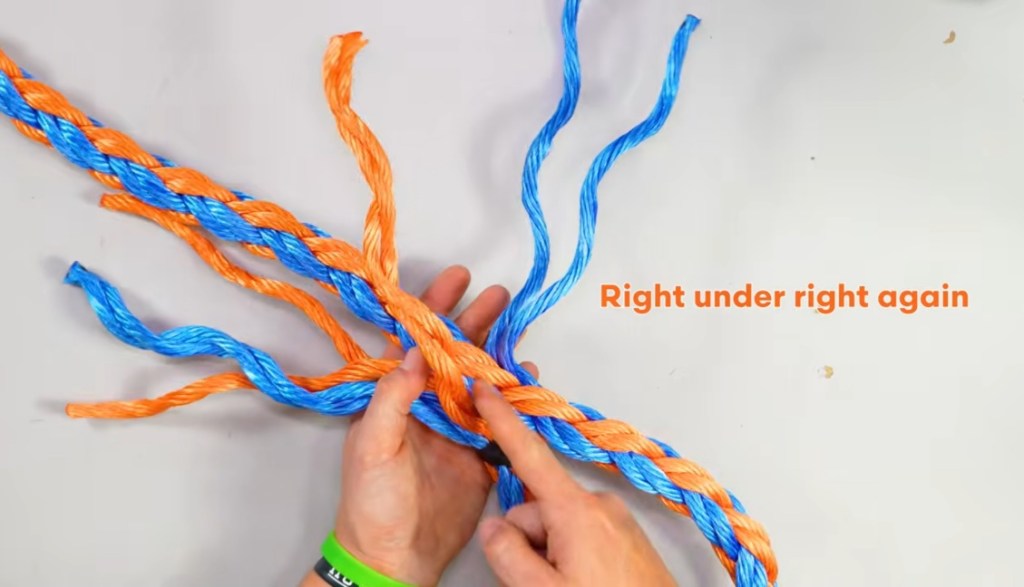
Now, to figure out how to assemble this whole thing; YouTube to the rescue. I settled on a video where a nice young man carefully explained an 8-strand splice using a rope that was color-coded blue and orange to make it easier to see the critical “left” and “right” strands. Let me assure you that to a novice looking at a blue rope, “left” and “right” do not jump out and make themselves obvious! By the end of my project, I was begging him to make a new video with all blue strands to level the playing field. But I digress.
Tools needed for splicing include a pointy thing called a marlinspike, a funnel-shaped thing called a fid, and a hot knife for cauterizing synthetic line. We had only the marlinspike on board, and were nowhere near a specialty marine store or overnight Amazon locker, but as always, we made it work. The fid is for pushing the strands between other strands of the rope, but I settled for binding the ends of the strands in tape (color-coordinated to help with left and right), and pushing the strands through—pretty easy with material this chunky.
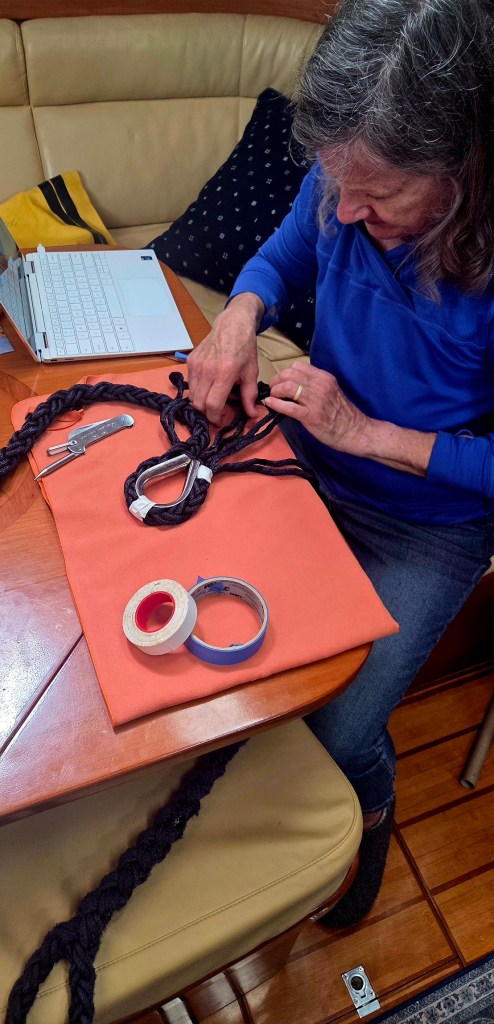
Oh, and my project had one more complication: the thimble had to be firmly spliced into the loop. I secured it with tape at first and then was able to include it as I began the splice, strand by strand. The first bit was the hardest and most critical, but eventually mine actually looked like a monochrome version of the YouTube splice.
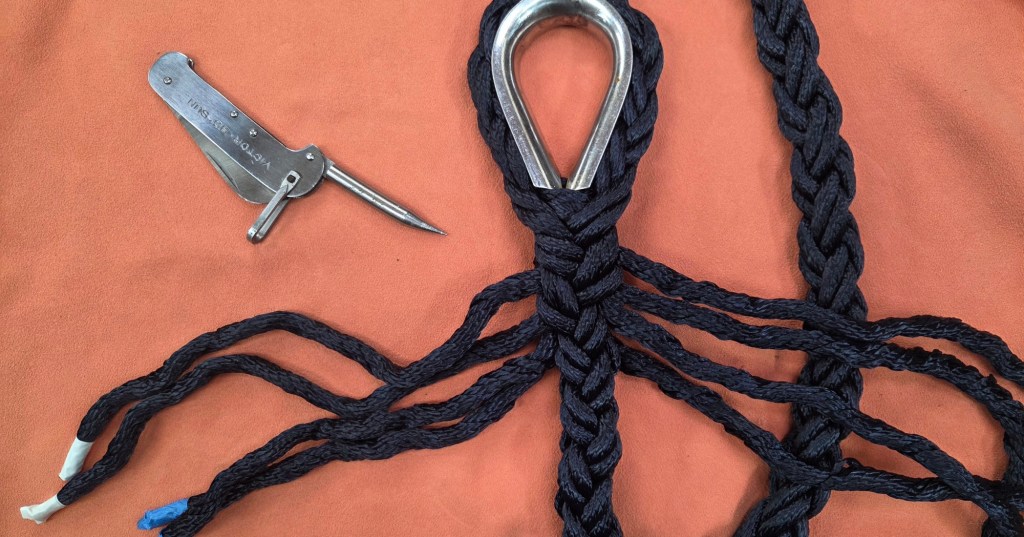
Splicing was alternately frustrating and zen-like; a few times I set it down to breathe a bit before resuming. The result was not nearly as pretty as my YouTube expert’s work, but it is strong and a good first attempt at the craft.
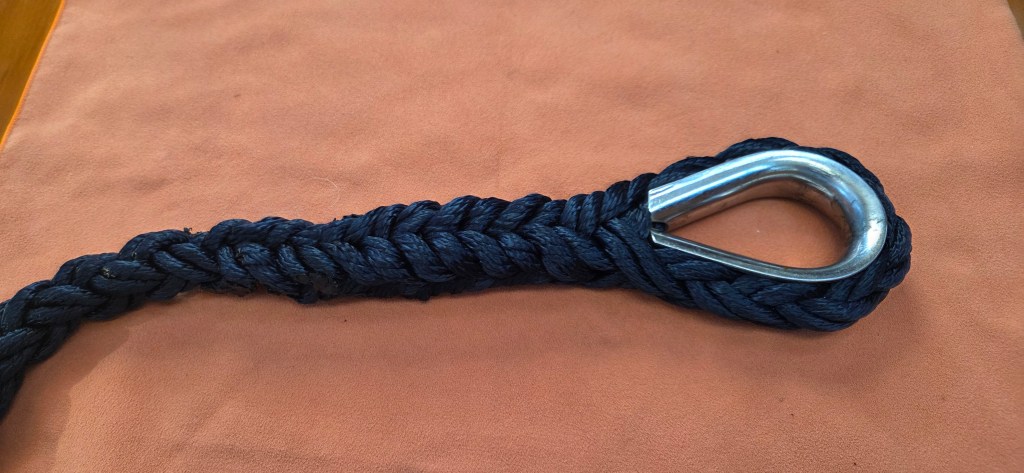
Now, the bit about not having a hot knife. We puzzled some solutions for searing the ends of the strands and melting them into the splice without destroying the whole project. Google Maps helped us find a hardware store with a small marine section and a reputation for friendly service, giving me an idea. We walked to the store, project in hand, and selected a few things to purchase for other boaty needs. Then we hung out at the rope department in the back of the store, and when an employee came to help, I showed my splice and asked “Posso… (Can I…)…” pantomiming using their hot knife to put the finishing touches on the project. The answer was “yes,” and I trimmed and sealed the splice.
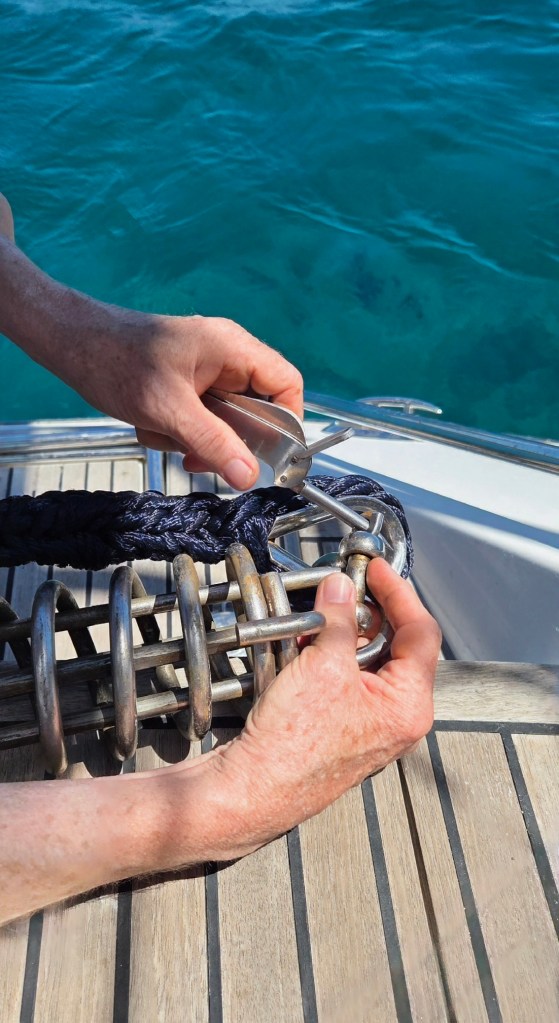
The last little bit was fun because it could be done on the back steps of the boat over insanely blue water (remember the bit about cruising being boat repairs in exotic locations). We just shackled the new bit onto the original equipment (using that handy marlinspike again…), and voilà—ready to hold Quintessa when we leave her on the dock for the summer.

Leave a comment